The door should now be considered since you are in the wall-building phase of your shed project. You’ve chosen to forego the typical wooden door with hinges. Maybe you’d like to prevent pests from entering your shed. Or perhaps all you want is more comfort.
Whatever the motivation, you’ve made the decision to add a roll-up shed door to the entrance of your masterpiece to complete it. A roll-up door is a fantastic option for any garage or shed door opening.
For many residential and commercial applications, roll-up doors are the best door choice because they are strong, safe, and simple to install.
What is a Roll-Up Door?
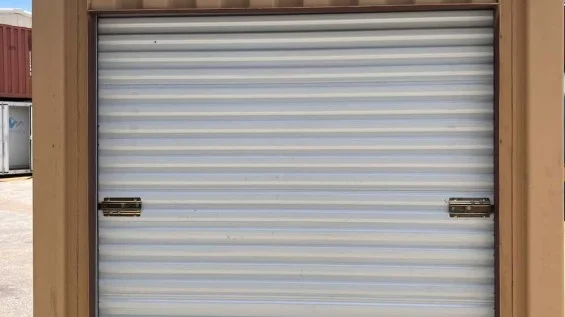
The answer to this query is probably already known if you’ve ever wanted to rent a storage unit. The doors made of corrugated metal that roll upward like a garage door are known as roll-up doors.
That is corrugated metal doors that roll upward by wrapping around a large cylinder mounted on the ceiling. The roll-up door, however, does just that -it rolls up- in contrast to a standard garage door, made of metal or wood panels that ascend into the garage ceiling along a track.
As soon as it is raised, it encircles a sizable cylinder fixed to the ceiling directly above the entrance to your shed.
What are the Benefits of Roll-Up Doors?
Roll-up doors offer a lot of advantages.
- Easy access: Roll-up doors are perfect for sheds because they save space. Since these doors don’t need the long track mounted on the ceiling like a typical garage door, they free up valuable ceiling space. Just above the doorway, roll-up doors require comparatively little clearance.
- Ease of use: Roll-up doors are also more secure and easier to use than typical shed doors in the barn style. Tough metal roll-up doors have strong latches that can be padlocked securely, unlike those on a standard wood or aluminum shed door, which can be easily pulled apart.
- Lightweight: Roll-up doors are also lightweight, and the tension cylinder that supports the door’s weight allows for quick and simple raising and lowering.
- Low maintenance: Metal roll-up doors are a low-maintenance option due to their robust design and construction. No need to be concerned about peeling paint, rotting wood, or sagging hinges in this place.

How to Install a Roll-Up Door (Step-by-Step Guide)
1. Pick the suitable roll-up door based on your rough opening size
It should go without saying that you need to buy a roll-up door that is appropriate for your particular door rough opening application. Simply take measurements of the opening’s width and height from the floor to the door header above to determine the opening’s rough dimensions.
For illustration, let’s assume that we have an opening with a rough width and height of 6′ and 7′, respectively. The rough opening determines how most roll-up doors are ordered.
The roll-up door will be made just a little bit bigger than the rough opening so that the guide rails can mount on the frame of the rough opening.
Therefore, a 6’x7′ roll-up door would be ordered for a rough opening of 6′ by 7′. For the clearance required above the roll-up door’s barrel curtain, there is a requirement known as “headroom.” In general, roll-up doors need about 16 inches of height above the rough opening and 4 inches of side room on either side of the rough opening.
Verify the requirements with your particular roll-up door. Spend some time looking around for a roll-up door suitable for your application after determining the rough opening for your roll-up door.
2. Connect the roll-up door legs to the barrel and curtain
Usually, your roll-up door will be delivered unassembled after you have ordered it. Although there are only a few parts and all the necessary hardware (bolts, screws, etc.) are usually included, assembly is very straightforward.
The roll-up door guides (legs) are connected to the barrel and curtain in the first step of the roll-up door assembly process. Your roll-up door should be assembled in the position and direction it will be installed.
By doing this, you won’t need to move the roll-up door once it’s been assembled.
Use the provided hardware to attach the guides to the barrel curtain. Below are the typical steps necessary for assembly. Refer to the manufacturer’s instructions for specific assembly instructions for your specific roll-up door.
- Organize the roll-up door guide and barrel penetrations in a straight line.
- The provided hardware should be threaded, so pass it through the guide and barrel before hand-tightening the nut on the opposite end.
- The mounting hardware should then be tightened entirely using a wrench. Repeat these steps for each guide/barrel connection.
You can proceed to the following stage of the roll-up door installation after fastening the guides to the barrel.
3. Position the roll-up door within the door’s rough opening
The roll-up door should be placed close to the rough opening at this point. The guide’s base should essentially be pressed up against the door’s rough opening.
4. Lift the roll-up door in place against the rough opening frame
Lift the assembled roll-up door vertically into position inside the rough opening after fastening the guides to the barrel and positioning it there. To avoid damaging (bending) the guides, you are strongly advised to get assistance lifting the roll-up door into position.
Lift the roll-up door repeatedly until the guides touch the rough opening frame. Consider using a bar clamp to hold the roll-up door against the rough opening frame.
You can proceed to the following step of the roll-up door installation process after lifting the roll-up door into position and momentarily clamping it in place.
5. Ensure uniform spacing between the door guides
You must make sure that the distance between the guides is uniformly spaced across the roll-up door’s entire height before attaching your guides to the rough frame. To do this, count the number of guides spaced apart at the top of the door, close to the barrel. The correct answer is 6′.
1. The top of the rough opening should have roll-up door guides, so measure the distance between them.
2. Take a measurement between the roll-up door guides at the bottom of the rough opening.
3. It is recommended that the distance between the guides at the top and bottom of the roll-up door match. Make the necessary adjustments if these measurements don’t line up. Place a 6′ level against the roll-up door guides to verify the plumb. You can move on to fasten the roll-up door guides to the rough opening frame after ensuring they are evenly spaced.
6. Install fasteners to the rough opening frame
When you’re certain that the guides are evenly spaced out, use the included hardware to secure the roll-up door to the frame of the rough opening.
The guides’ bottom, middle, and top typically have fasteners installed. Fasteners should be put in place at the roll-up door guides’ bottom. The roll-up door guides should have fasteners installed in their middle and top. The roll-up door barrel typically has two mounting locations as well. The roll-up door barrel penetrations should be used to install fasters.
You can move on to the following step of the roll-up door installation once you have installed fasteners through all of the mounting locations on the roll-up door guides and the barrel.
7. Adjust spring tension
At this point, the roll-up door curtain will be lowered inside the tracks. But first, you must establish the initial spring tension.
The roll-up door’s initial spring tensions should be set. Simply turn the barrel two (2) revolutions in the direction that would send the bottom bar of the curtain through the guides to set the roll-up door’s initial spring tension.
The roll-up door curtain should be lowered through the guides after pre-tensioning the barrel. Once the curtain has been lowered through the guides, test the tension by opening and closing the roll-up door a few times.
If necessary, adjust the roll-up door tension. Lift the tensioner Prawl (left hand) and place a screwdriver (or something similar) into one of the slots on the tensioner ratchet wheel (right hand) to adjust the tension on the roll-up door.
Rotate the tensioner wheel in a “downward” direction to tighten the roll-up door. The tensioner wheel should be turned “upward” to reduce the curtain tensions.
Test your roll-up door again and, if necessary, adjust the tension. Your roll-up door installation is almost complete once the ideal tension has been determined for the particular application of your roll-up door.
8. Install hardware
Installing the roll-up door hardware is now the only thing left to do. Use the mounting hardware that is included first to install the door handle. Install the head stops next to prevent the roll-up door from retracting all the way into the barrel.
The mini clips that will contact the head stops when the curtain is fully open should then be installed. Make sure everything is working properly by testing your roll-up door a few times after installing the hardware.
Last but not least, if your roll-up door height exceeds 6 feet, you might want to install a pull string to reach the curtain when it is fully opened. Your roll-up door installation is finished at this point!
Conclusion
Roll-up doors have several fantastic benefits for shed doorways. They enhance the safety and usefulness of your shed.
Additionally, they provide a professional appearance without requiring a professional installation installer. You’ll be able to quickly install a roll-up door on your shed by paying attention to these instructions. In a nutshell, the whole process is as follows:
You must measure your door’s rough opening before buying a roll-up door that will fit, as this is the first step in installing one.
After that, place the roll-up door’s frame guides (legs) at either end of the rough opening for the door before lifting it into position vertically. After ensuring the roll-up door is level and plumb, fasten the door frame to the rough opening using the mounting holes.
Finally, install the hardware (handle, etc.) and adjust the roll-up door’s tension as necessary.